Draw & Edit AOIs
You may create & edit AOIs by drawing them on the map in a GO project.
Remember that you may only create and edit AOIs in projects that have not yet been run.
Navigating around the Map
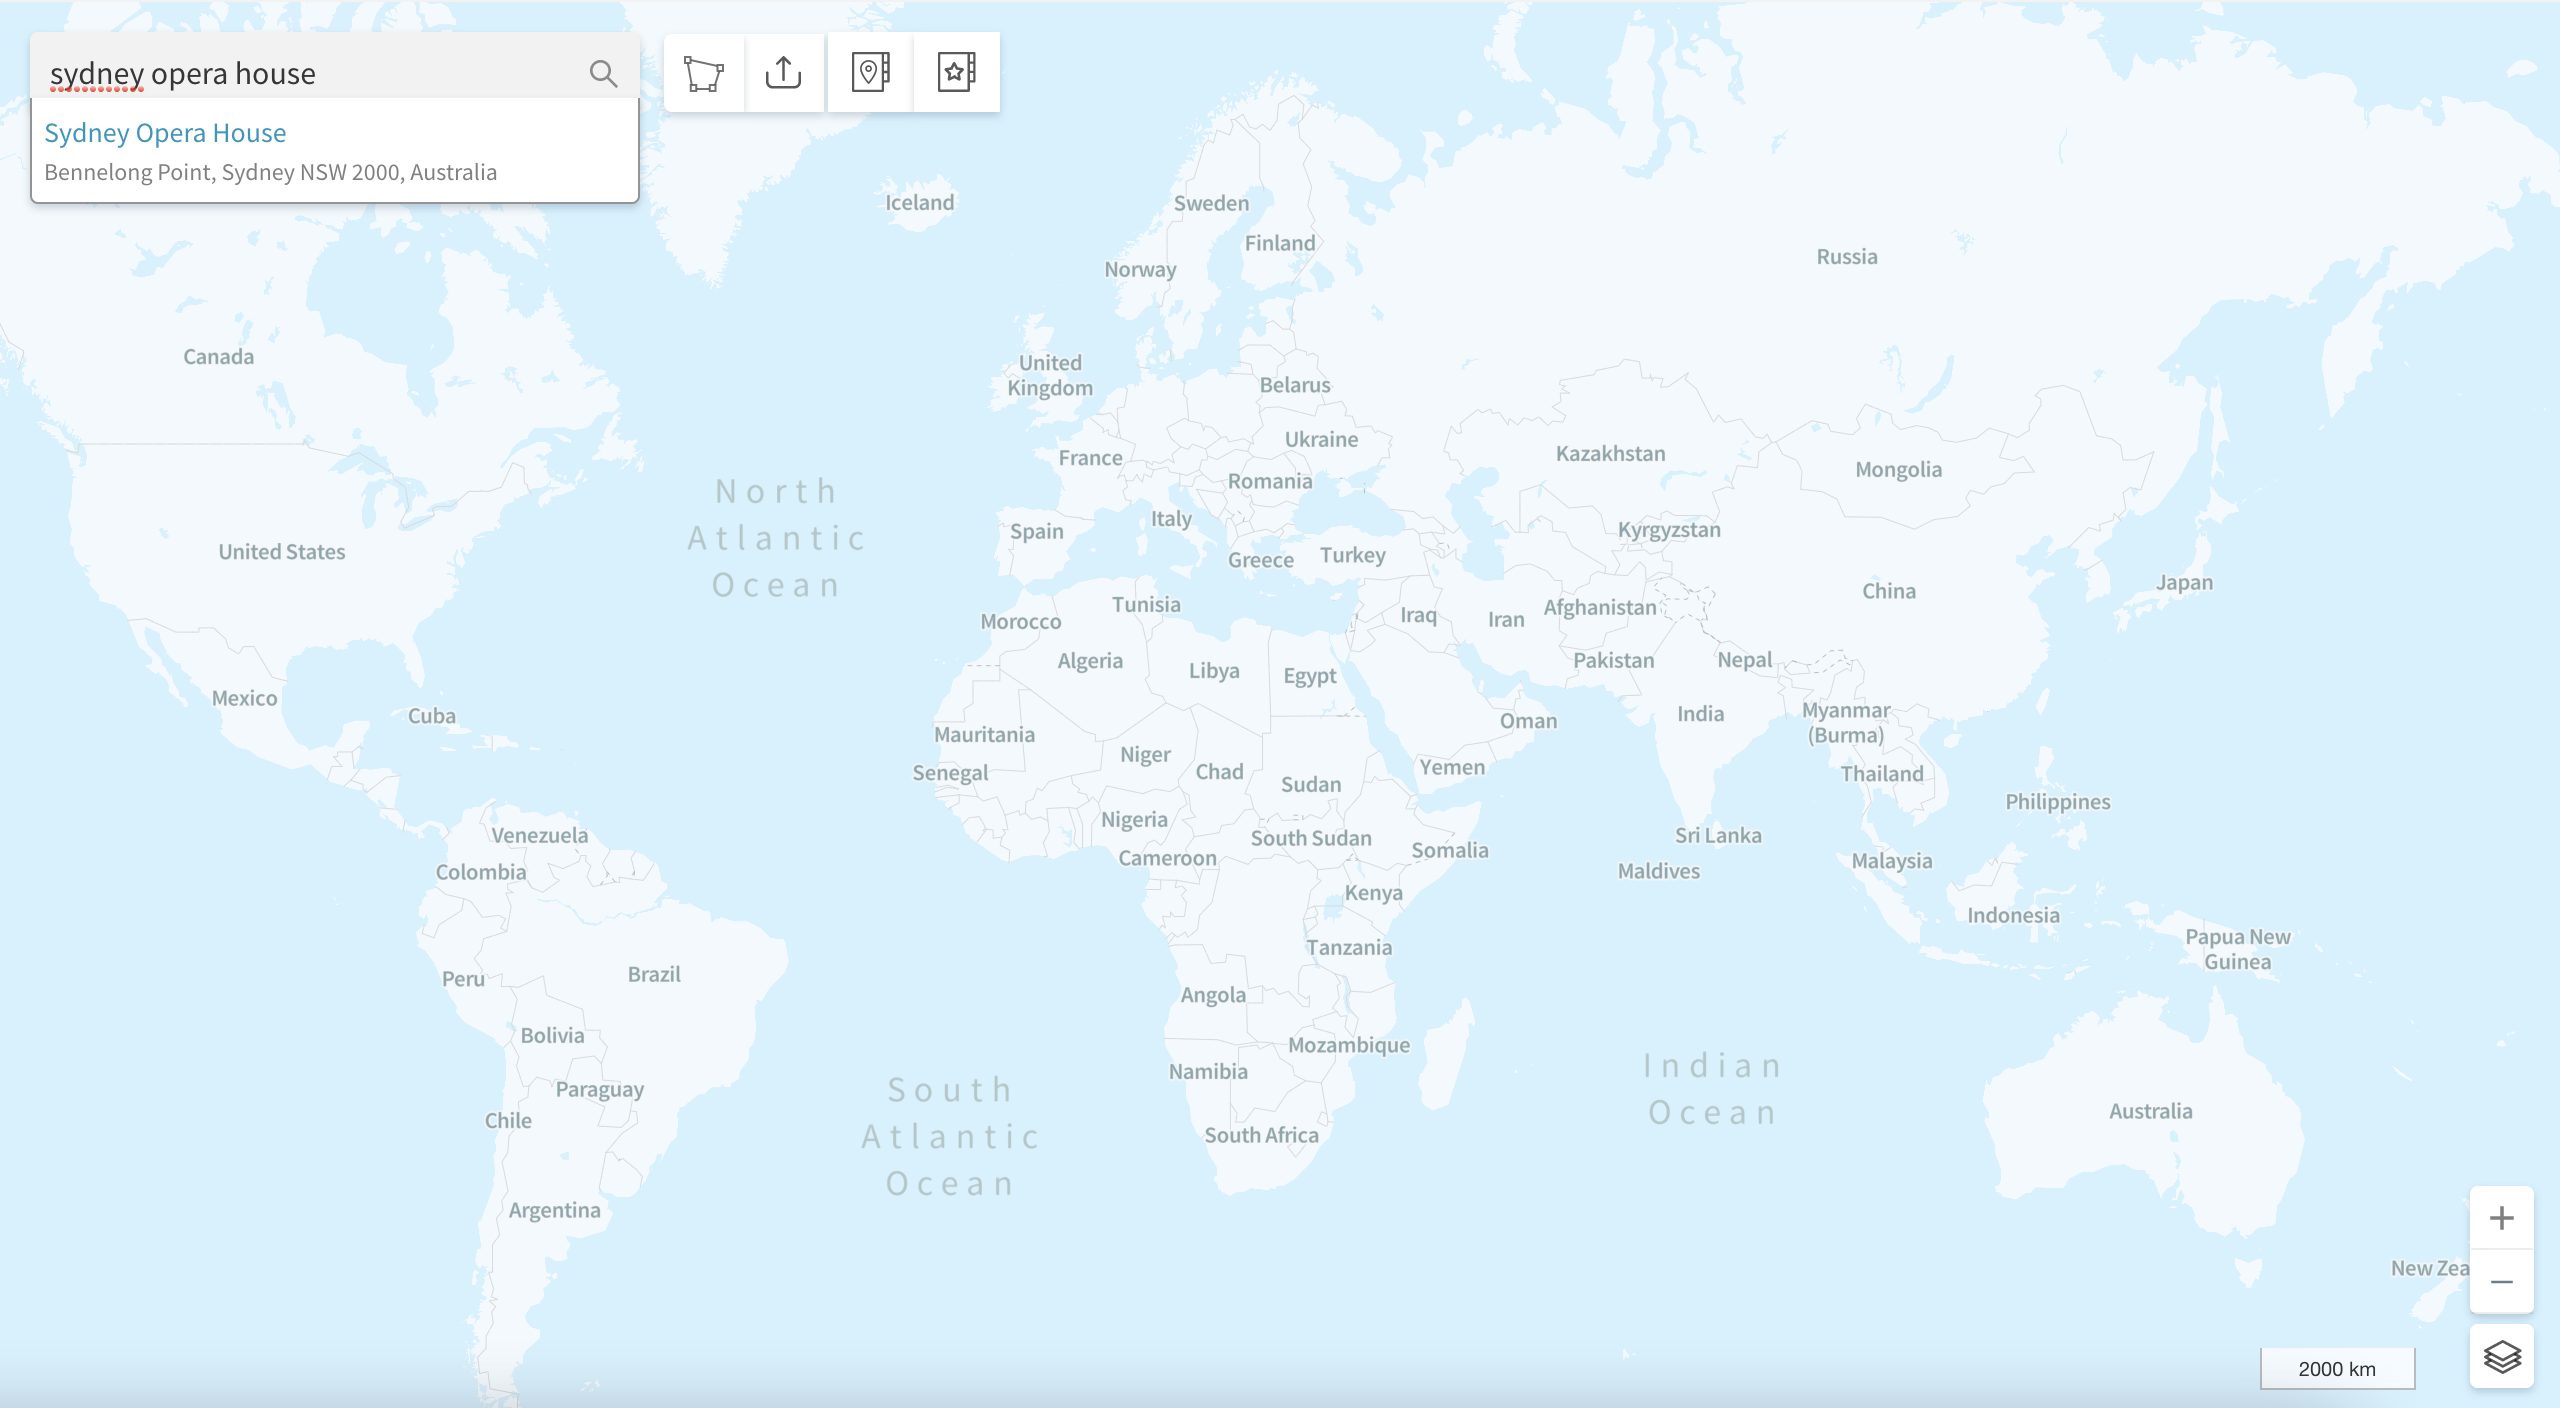
Firstly, you probably want to navigate to your area of interest on the map. An easy way to do this is through the navigation search box on the top-left of the map - simply type what you are looking for and select from the search results:

Searching for the Sydney Opera House (this search is powered by Google Maps)
Drawing a New AOI
You may draw a new AOI by clicking  (next to the navigation search box).
(If this is not visible, click  under the Areas of Interest panel, to enable editing of AOIs.)
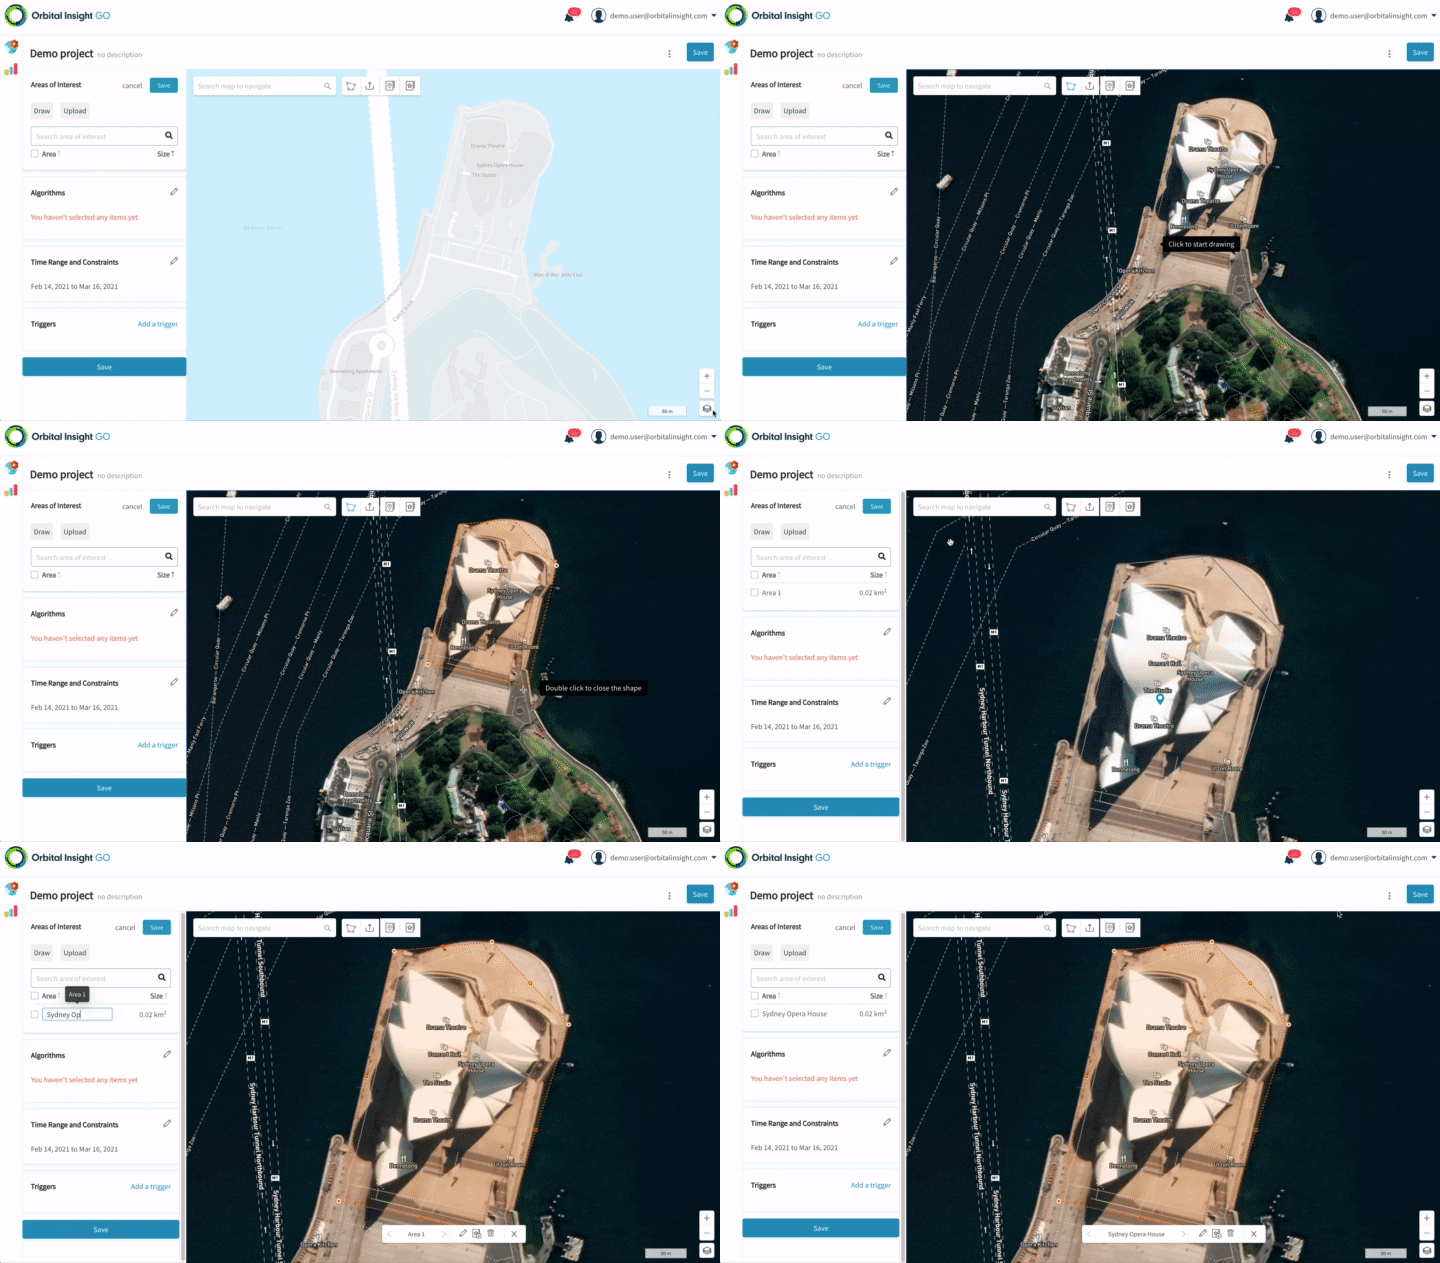
From here, click on the map to start drawing your AOI, then double-click (or click on the first point you added) to finish the AOI:

Drawing an AOI
You may want to switch to a satellite basemap by using the  toggle on the bottom-right corner of the map, as in the example above.
Editing an Existing AOI
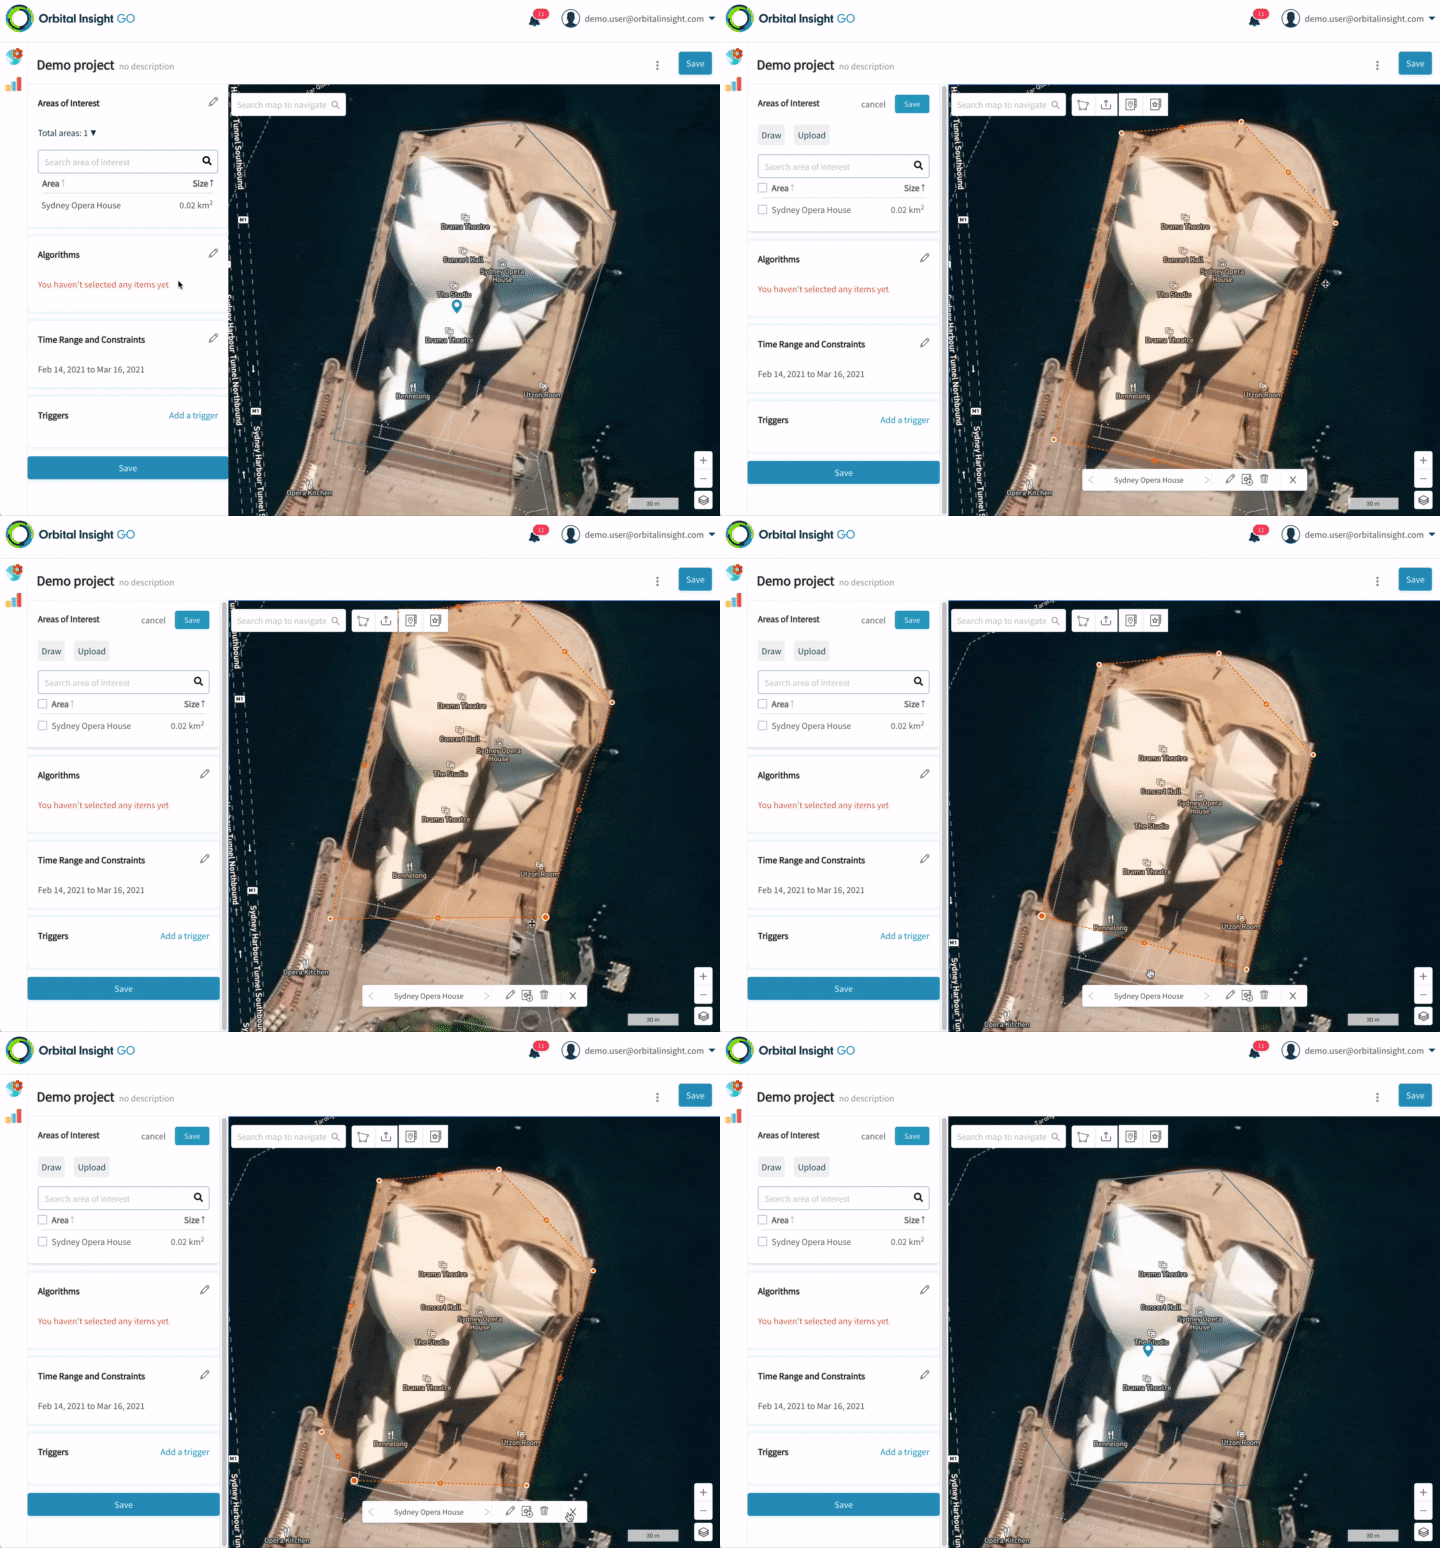
You may edit an AOI by clicking it on the map, or by clicking on it in the list of AOIs. This will pan/zoom the map to the AOI, and show the AOI in a bright orange border.
From here, click & drag on the existing vertices  to move them around, and click & drag on the midpoints
  to add a new vertex between 2 existing vertices.

Editing an AOI
Finally, click on the map outside the AOI, or click to save & finish editing the AOI.
Updated over 3 years ago